Ever wonder how the biggest Discord communities seem to run themselves, staying perfectly organized and buzzing with activity? It’s not magic—it’s bots. These automated tools are the real MVPs, the secret weapon behind almost every successful server. They can turn a quiet chatroom into a thriving hub of interaction.
Getting a bot onto your server is usually as simple as finding one on a directory like top.gg, grabbing its invite link, and giving it permission to join. That simple process is all it takes to automate moderation, add cool new features, and seriously boost engagement.
Manage all your social media in one place with Postiz
Why Discord Bots Are Essential for Server Management
After managing and automating multiple Discord servers for creators and businesses, I’ve seen firsthand how the right bot setup can dramatically reduce moderation workload while improving engagement. Servers that implement proper bot permissions and role structures tend to scale faster and stay healthier long-term.
Think of bots as your tireless server assistants. They handle all the repetitive, thankless jobs that would otherwise burn out a human moderator. This is how you scale a community without losing your mind.
From Manual Grind to Automated Success
Instead of manually greeting every new member or policing every channel, you can let a bot do the heavy lifting.
Moderation: Imagine a 24/7 security guard for your server. Bots can automatically filter spam, zap inappropriate messages, and issue warnings or kicks, keeping your community safe around the clock.
Engagement: A good bot makes your server fun. It can welcome new members with a custom message, let users assign their own roles, run polls, and even host mini-games. Some servers also use custom formatting and stylized text for announcements and welcome messages, which can be created using a Discord font generator.
Utility: Want to play music in a voice channel? Need to pull up stats for a game? Utility bots add layers of functionality that make life easier and more interesting for everyone.
This level of automation frees you up to focus on what actually matters: building real connections with your members.
The impact here is huge. It’s not uncommon to see a creator’s server absolutely explode with activity right after adding a few key bots. The numbers don’t lie: Discord hosts 12 million active bots, and they’re responsible for a staggering 28% of all messages sent on the platform.
For creators and business owners, this is a game-changer. You spend less time on tedious oversight and more time creating a professional, welcoming space that people want to be a part of. It’s a foundational piece of any solid community growth strategy.
Mastering bot integration isn’t just about adding a neat feature; you’re making a direct investment in your server’s health and your members’ happiness. When you understand how Discord marketing works, you can turn that well-oiled, automated server into a powerful engine for growth, especially when combined with a dedicated Discord content and automation workflow.
And while Discord is a fantastic platform, it’s always smart to know what else is out there. If you’re curious, you can check out some of the top alternatives to Discord to see how they stack up.
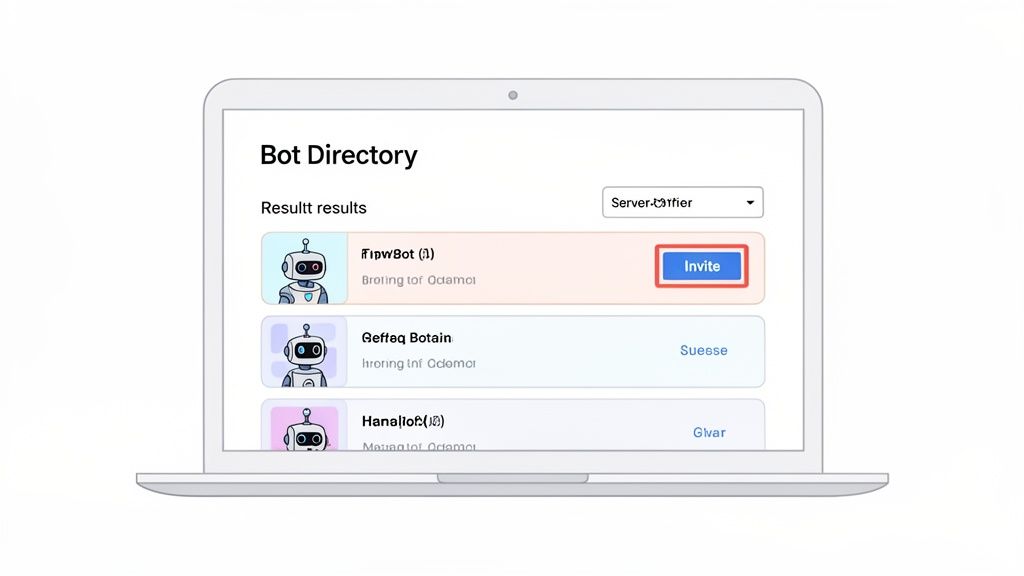
So, you’re ready to bring a bot into your Discord server, but where do you even begin? Before you can add one, you need to find the right fit for your community. The best place to start is a trusted bot directory—think of them as massive app stores just for Discord.
The undisputed champion here is top.gg. It’s the go-to for pretty much every server owner I know. Whether you need a powerhouse moderation bot like MEE6 or something more creative like Midjourney for AI art, you’ll find it there. It’s a huge library where you can browse and filter thousands of bots built for any purpose you can imagine.
Where to Find Safe Discord Bots (top.gg Explained)
So, you’re ready to bring a bot into your Discord server, but where do you even begin?
How to Safely Pick a Bot
As you’re scrolling through a site like top.gg, there’s one thing you absolutely need to look for: the Verified Bot tag. This little checkmark is a big deal. It means Discord’s own team has vetted the bot and its developer.
To get verified, a bot has to be in at least 100 servers and meet Discord’s quality and safety standards. It’s a seal of approval you can trust.
I can’t stress this enough: sticking to verified bots is the single best thing you can do for your server’s security. An unverified bot could be sketchy, potentially putting your server or your members’ data at risk. Always, always look for that checkmark before inviting.
It’s a simple check that weeds out a lot of potential headaches down the road.
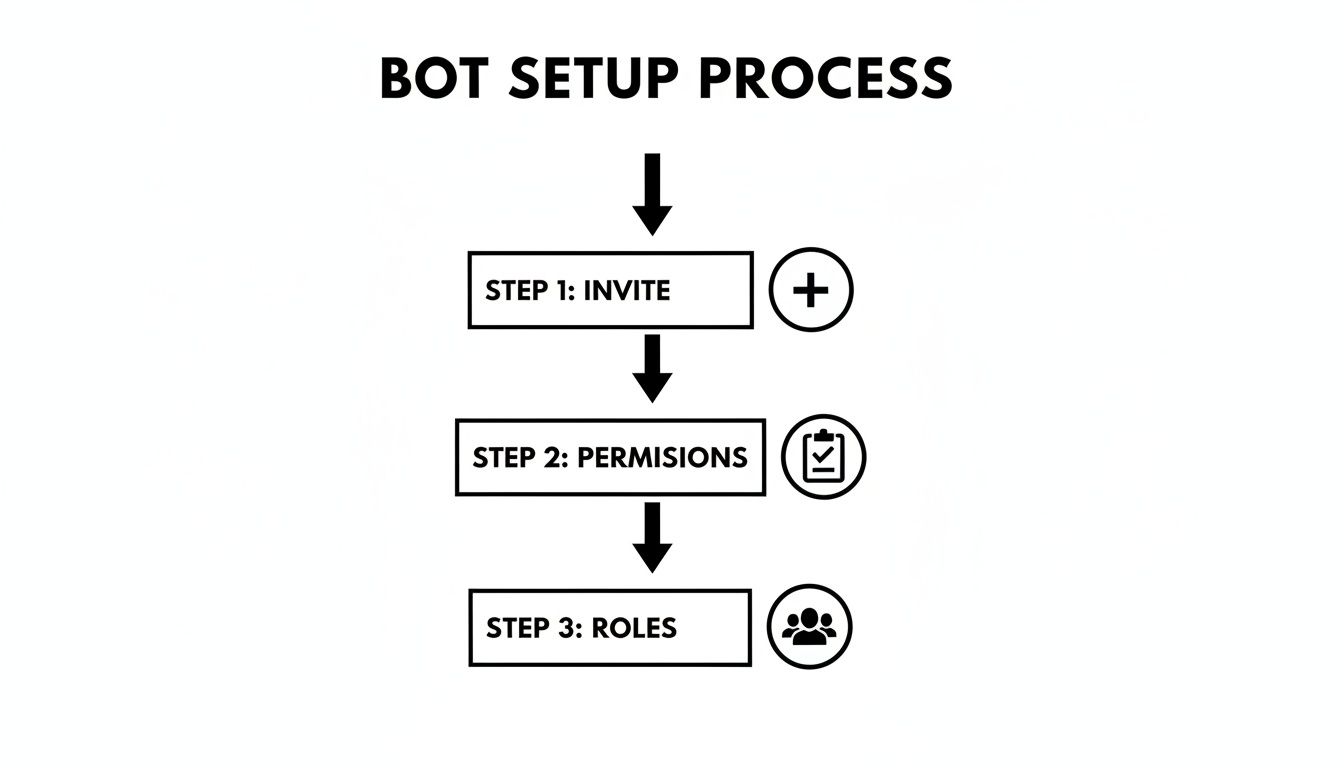
Inviting and Authorizing a Bot
Found a bot you like? Great! Getting it into your server is pretty straightforward. It all boils down to the invite link.
Here’s how it usually goes:
Find the Invite Button: On the bot’s page in the directory, you’ll see a big, obvious button that says “Invite” or “Add to Server.” Give that a click.
Pick Your Server: A new window will pop up. If you’re not already logged in, Discord will ask you to. Then, you’ll see a dropdown menu labeled “Add to Server.” Just choose the server you want the bot to join from that list.
Check the Permissions: The next screen is important. It shows you a list of all the permissions the bot wants. We’ll get into the nitty-gritty of what these mean later, but for now, just understand this is what lets the bot do its job.
Give the Green Light: Once you’ve looked everything over, hit “Authorize” and solve the quick CAPTCHA. Just like that, the bot will pop up in your server’s member list.
This is what you’ll typically see on a bot directory page when you’re ready to start the process.
The whole flow is designed to be quick and painless, getting you from discovery to setup in just a few clicks.
And don’t worry, this process is nearly identical whether you’re on your computer or using a browser on your phone. The core steps of finding the invite link, picking a server, and authorizing permissions are the same everywhere.
Automating things on Discord is a massive time-saver, and that same idea applies to other tools, too. If you’re looking to connect and streamline more of your daily tasks, you might find it useful to learn how to use Postiz with n8n for some next-level automation.
Understanding Discord Bot Permissions and Roles
So, you’ve invited a bot to your server. Great! But the next screen you see—that long checklist of permissions—is where the real work begins. This is a crucial moment for your server’s security and long-term health. It’s incredibly tempting to just scroll to the bottom and click “Authorize,” but don’t.
Think of it like hiring a new employee. You wouldn’t hand them the keys to the entire building on their first day, right? You’d give them access only to the rooms they actually need to do their job. Bots are no different.
The “Least Privilege” Rule of Thumb
The single best practice you can adopt is the principle of least privilege. It’s a simple idea: only give a bot the absolute minimum permissions it needs to do what you want it to do.
A music bot, for instance, has no business kicking members. A meme-generating bot definitely doesn’t need to manage your server’s channels. Granting a bot too much power opens up a massive security hole if that bot is ever compromised or its developer goes rogue.
Pro Tip: Start with the bare minimum. You can always head into your server settings later and grant more permissions if a specific feature isn’t working. It’s far easier to add a permission than to clean up the mess a rogue bot with too much power can make.
Getting this right is what separates a well-managed community from a chaotic one. Bots are the lifeblood of many servers, accounting for a massive 28% of all messages sent on Discord. And for good reason! Admins who set up their bots correctly report a 45% drop in their manual moderation and management workload. You can dig into more numbers like these in these in-depth Discord statistics.
A Quick Guide to Common Bot Permissions
That wall of checkboxes can look pretty intimidating. Let’s break down some of the most common—and most powerful—permissions you’ll encounter. Understanding what these permissions actually do is key to making smart decisions when adding a new bot.
Below is a table that explains some of the most critical permissions, what they allow a bot to do, and the potential risk involved.
Essential Discord Bot Permissions Explained
Permission
What It Does
Risk Level
Administrator
Gives the bot every single permission and bypasses all channel-specific restrictions. The “god mode” key.
CRITICAL
Manage Server
Allows changing the server name, region, and other top-level settings.
High
Manage Roles
Lets the bot create new roles, edit existing ones, and assign them to users (below its own role).
High
Manage Channels
Gives the bot power to create, edit, and delete text and voice channels.
High
Kick Members
Allows the bot to remove users from the server. They can rejoin with a new invite.
Medium
Ban Members
Allows the bot to permanently remove users and prevent them from rejoining.
Medium
Manage Nicknames
Lets the bot change the server nicknames of other members.
Low
Manage Messages
Allows the bot to delete messages from other users or pin messages. Essential for moderation bots.
Medium
Send Messages
The most basic permission. Allows the bot to post messages in channels it can see.
Low
Read Messages
Another fundamental one. Allows the bot to see messages in channels it has access to.
Low
The takeaway here is simple: never, ever grant Administrator permission unless you wrote the bot yourself or trust the developer with your entire server. For almost every public bot, it’s complete overkill and a huge security risk.
How to Set Up a Dedicated “Bots” Role
One of the tidiest ways to manage your new digital helpers is to create a dedicated role just for them. This keeps things organized and gives you a single place to control their baseline permissions.
Here’s how to do it:
Head into Server Settings > Roles.
Click the Create Role button.
Name it something obvious, like “Bots” or “Automated Helpers.”
Now for the most important part: the role hierarchy. Drag your new “Bots” role so it sits above your general member roles but below your moderator and admin roles.
This positioning is strategic. It lets your bots manage regular users (like assigning roles) without giving them the power to mess with your human staff. Once it’s in place, just assign this role to every bot you add. It’s a simple step that will save you a world of headaches down the line.
Beyond moderation and automation, roles are also commonly used for monetization. Many creators use bots to assign paid roles, manage tiered access, and unlock exclusive perks for members.
How to Add a Custom Discord Bot (Developer Portal Guide)
While public bots are fantastic, there comes a time when you might need something truly unique for your community. This is where custom bots come in. Building your own bot gives you complete control to create features designed specifically for your members. The journey starts not with lines of code, but inside the Discord Developer Portal.
Think of the Developer Portal as mission control for any app you want to connect with Discord. Before your bot can do anything, you have to register it here to make it official.
Creating Your Bot Application
First things first, you need to head over to the Developer Portal and click the “New Application” button. This doesn’t create the bot itself, but rather the container that will hold its identity, settings, and secrets.
Once you give your new application a name, you’ll see a menu on the left. Click on the “Bot” tab—this is where the magic happens.
Here, you’ll find an “Add Bot” button. Clicking this officially creates the bot user for your application and, most importantly, reveals its token.
CRITICAL WARNING: Treat your bot’s token like a password. It’s the key to the kingdom. If anyone gets this token, they have full control over your bot. Never share it publicly, and never commit it to a public GitHub repository. Keep it secret, keep it safe.
Generating Your Invite Link
Unlike public bots with a simple “Invite” button on a website, you have to build the invite link for your own creation. You’ll do this using the OAuth2 URL Generator found in your application’s settings.
This tool helps you construct a special URL that tells Discord exactly what you’re trying to add and what permissions it needs. It’s a two-part process:
Scopes: In the “Scopes” section, you absolutely must check the bot box. This is what tells Discord that the URL is for authorizing a bot user.
Permissions: Just like with public bots, you’ll go through the list below and select every permission your bot needs to function correctly. The generator will create a unique permissions integer that gets embedded right into the URL.
The whole setup process, from invitation to final role assignment, follows a clear path.
Once the URL is generated, just copy it, paste it into your browser, and you’ll see the familiar authorization screen. From there, you can add it to any server where you have “Manage Server” permissions.
Of course, a custom bot isn’t just an entry in the Developer Portal; it’s code that needs to run somewhere. For a deeper dive into self-hosting, this guide on the Best VPS for Hosting Discord Bots is an excellent resource for picking the right server environment. If you’re interested in the broader world of custom automation, exploring various open-source automation tools can give you some great ideas.
Common Discord Bot Problems and How to Fix Them
So, you’ve added your bot, but something’s not quite right. It happens. Technology can be finicky, but don’t worry—most bot issues are caused by just a handful of common problems, and they’re usually easy to fix once you know what to look for.
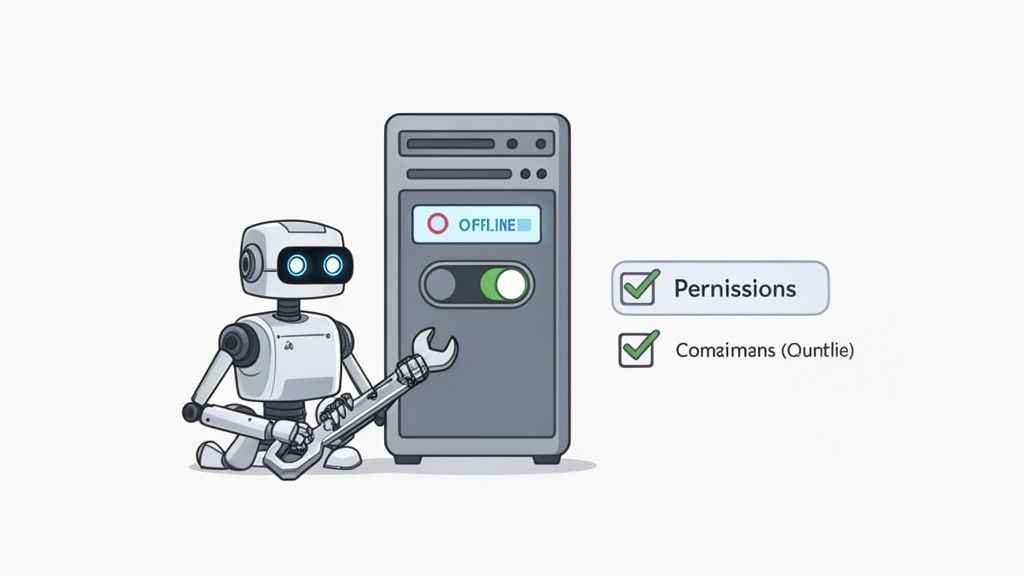
The most common panic-inducer is when a bot shows up as offline right after you’ve invited it. Your first instinct might be to dive into your server settings, but hold off. More often than not, this isn’t a problem on your end. The bot itself could be down for a quick maintenance break or suffering a wider outage.
Before you start troubleshooting your own server, do a quick check on the bot’s status. Most popular bots have a dedicated support server or a status page you can find with a quick search. A glance there can save you a lot of time and confirm if it’s a “them” problem, not a “you” problem.
When Commands Go Missing
Okay, but what if the bot is online and its slash commands (the ones you trigger with “/”) are nowhere to be found? You type / and expect a menu of options, but get nothing. This almost always comes down to how the bot was invited.
When you add a bot, the invite link contains specific permissions called “scopes.” For modern bots that use slash commands, the applications.commands scope is absolutely essential. If that wasn’t checked or included in the invite link you used, Discord simply won’t know to register the bot’s commands on your server.
Luckily, the fix is a breeze:
First, kick the bot from your server. Just right-click its name in the member list and select “Kick.”
Next, head back to the bot’s official website or listing page.
Use their official invite link to add the bot again. The correct link will have all the necessary scopes built-in.
This simple re-invitation process fixes the issue over 90% of the time. It gives Discord the proper handshake it needs to get the bot’s commands working as intended.
If you’re working with bots that post automated messages or command responses, it also helps to stay within Discord’s message limits using a Discord character counter.
Why a Bot Might Ignore You
Here’s another classic scenario: the bot is online, its commands appear just fine, but when you try to use one in a specific channel, it gives you the silent treatment. This is a dead ringer for a permissions problem, but at the channel level, not the server level.
Even if you’ve given the bot a role with all the right permissions server-wide, individual channel settings can override those rules. The bot needs explicit permission to see and speak in the channel you’re using.
Go into the channel’s settings (Edit Channel > Permissions). Check to see if the bot’s role has “View Channel” and “Send Messages” enabled. Also, make sure there isn’t another rule specifically denying its access.
I ran into this myself once. I had a welcome bot that was working perfectly everywhere except in my #rules channel. It turned out I had locked that channel down so only admins could post, to keep it clean. Once I went into the channel permissions and added an explicit green light for the bot’s role, it worked immediately. It’s a great reminder that channel-specific overrides are often the sneaky culprit.
Discord Bot FAQ
To wrap things up, let’s go over a few of the most common questions I hear from server owners. Think of this as a quick reference guide for those lingering doubts about adding and managing bots.
Are Discord Bots Actually Safe to Add?
For the most part, yes, but you have to be smart about it. The best practice is to stick with bots that have earned the “Verified” checkmark from Discord. This little badge means Discord’s own team has vetted the bot and its developer, so you know it’s not some fly-by-night operation.
Before you ever click “Authorize,” take a second to look at the permissions the bot is asking for. A big red flag is a bot asking for Administrator access when it doesn’t need it. That permission gives a bot the keys to the kingdom, so only grant it if you’re 100% sure it’s necessary and you trust the source.
What’s the Limit on How Many Bots a Server Can Have?
There’s no hard cap set by Discord, but that doesn’t mean you should go wild. The real limit is your server’s performance and, more importantly, your members’ sanity. Piling on dozens of bots will make your server feel sluggish and incredibly cluttered.
My advice? Choose a few high-quality, multi-purpose bots over a ton of single-taskers. A bot like MEE6 or Dyno can do the job of five or six smaller bots, keeping your server running smoothly and your member list clean.
Can I Add a Bot to My Server Using My Phone?
You sure can! The only catch is that you have to do it through your phone’s web browser, not the official Discord app. The app itself doesn’t have a bot store or an invite interface.
Just open up Chrome, Safari, or whatever browser you use and go to the bot’s website or a directory like top.gg. Find the invite link, tap it, and it’ll take you to the standard Discord authorization screen. From there, you’ll log in, pick your server, and approve its permissions, just like you would on a computer.
Help! My Bot’s Slash Commands Aren’t Showing Up.
Ah, a classic issue. If you’ve added a bot but none of its “/” commands are appearing, it’s almost always because it was invited without the right OAuth2 scope. Specifically, it’s missing the applications.commands scope, which is what allows a bot to register its commands with your server in the first place.
The fix is easy. You just need to re-invite the bot properly.
First, kick the bot from your server.
Then, go back to its official website or its page on a bot list.
Use the main invite link they provide to add it again. This will generate a new URL with all the correct scopes included, and the commands should pop right up.
Learning how to add a bot to a Discord server is one of the most effective ways to scale moderation, improve engagement, and build a professional community. Once your server is running smoothly, tools like :contentReference[oaicite:1]{index=1} can help you extend that automation beyond Discord and streamline content across all your social channels.
Ready to take your community management to the next level? Postiz offers a powerful open-source platform to schedule, analyze, and automate your social media content with ease.
Discover 10 actionable marketing ideas for social media in 2025. Boost engagement, reach, and conversions with these proven strategies and real examples.
Learn how to create buyer personas that drive real growth. Our guide covers data collection, analysis, and application to attract your ideal customers.
Ready to get started?
Grow your social media presence with Postiz. Schedule, analyze, and engage with your audience.