Your Quick Guide to Perfect Instagram Reel Dimensions
Getting your dimensions right isn't just a tiny technical detail; it's the foundation for a great-looking Reel. Treat the 1080 x 1920 pixel recommendation as the perfect canvas for your video masterpiece. This size is designed specifically for the vertical screens we all hold in our hands every day, making your content feel like it truly belongs on the platform.
The Importance of the 9:16 Aspect Ratio
The secret behind those perfect pixel dimensions is something called aspect ratio. It sounds technical, but it’s just the relationship between a video's width and its height. For Instagram Reels, the golden rule is 9:16. This is what gives you that signature tall, skinny video that fills the whole screen as you scroll.
What happens if you ignore it? Let's say you upload a standard horizontal video (like 16:9 from a TV or YouTube). Instagram has to make it fit somehow. It will either:
- Slap ugly black bars at the top and bottom of your video.
- Aggressively zoom in and crop the sides off your shot.
Either way, the result looks unprofessional and can even cut out key parts of your video. Sticking to the 9:16 aspect ratio from the very beginning is the best way to avoid this mess entirely.
Key Takeaway: Always shoot and edit your videos vertically in a 9:16 aspect ratio. This one choice has the biggest impact on creating a polished Reel that’s perfectly optimized for Instagram’s full-screen experience.
A Cheat Sheet for Technical Specs
To make things even easier, I've put together a quick-reference table with all the essential specs you need for a perfect upload. Whether you're a video pro or just getting started, keeping these numbers handy means you'll never have to guess your export settings again.
Think of this as your go-to guide for getting the technical stuff right every single time.
Instagram Reels Technical Specifications at a Glance
| Specification |
Recommendation |
| Dimensions |
1080 x 1920 pixels |
| Aspect Ratio |
9:16 |
| Recommended File Format |
MP4 or MOV |
| Recommended Codec |
H.264 |
| Maximum Video Length |
90 seconds (recorded in-app) or up to 15 minutes (uploaded) |
| Maximum File Size |
4 GB |
| Frame Rate |
24-60 FPS (30 FPS is standard) |
Bookmark this table or take a screenshot! Having these details on hand is a simple way to ensure your content always looks its best.
Why Instagram Reels Are a Must for Growth

If you've spent any time on Instagram lately, you've seen it. Reels are no longer just a feature; they've become the very heartbeat of the platform. What began as a response to TikTok has completely transformed how we share and watch content, making it an absolute must for anyone trying to grow their account.
This isn't just another passing trend. It's a real shift in how people use the app. Short, snappy videos are what grab and hold our attention now, and Instagram's algorithm has put all its chips on this format. It actively pushes Reels to a much wider audience, making them one of the best tools you have for getting discovered.
Getting why the technical details matter—like the correct reel size instagram needs—starts with understanding this shift. It's not enough to just make a video anymore. You have to create one that fits perfectly into the fast-scrolling, vertical world of Reels.
The Power of the Algorithm
Think of the Instagram algorithm as a very picky gatekeeper. Its main goal is to keep people on the app for as long as possible. Since Reels are incredibly good at holding our attention, the algorithm rewards them with prime real estate, often showing your video to people who don't even follow you.
This is a huge opportunity for growth that you just don't get with other types of posts. A single well-crafted Reel can catch fire, introducing your brand or personality to thousands of new people literally overnight. This is why learning https://postiz.com/blog/how-to-grow-instagram-followers almost always involves building a strong Reel strategy.
But there's a catch. The algorithm has standards. It prefers high-quality content that looks like it belongs on the platform. A video that's blurry, has the wrong dimensions, or cuts off important text just screams low-effort, and the algorithm is far less likely to show it to anyone.
Reels Dominate Feeds and Engagement
The numbers don't lie. Instagram Reels make up a massive 38.5% of all posts you see in the feed, which shows you exactly where Instagram is placing its bets.
And it’s not just about visibility. Reels deliver an average reach rate of around 30.81%, which blows other post formats out of the water.
This isn't just a coincidence. The format is designed to be addictive and shareable, making it a powerhouse for driving interaction and building a loyal following.
For businesses and creators, this means Reels have moved from the "nice to have" column to the "absolutely essential" one. They are your best bet for:
- Building Brand Awareness: Getting in front of fresh eyes.
- Driving Engagement: Racking up likes, comments, shares, and saves.
- Creating a Community: Connecting with your audience through fun, authentic video.
Connecting Growth to Technical Details
At the end of the day, your ability to go viral with Reels is directly linked to getting the basics right. A blurry, awkwardly cropped video will get skipped every time, no matter how brilliant the idea is. This is why knowing the perfect reel size instagram prefers isn't just a minor detail—it's a core part of your strategy.
When you make sure your videos are the correct size (1080 x 1920 pixels) and format, you’re delivering a clean, professional viewing experience. This signals quality to both users and the algorithm, giving your content the best possible chance to succeed. Mastering Instagram Reels for business starts with this foundation, ensuring your message makes a real impact and helps you hit your growth targets.
Making Sense of Aspect Ratios and Dimensions
Let's break down the numbers that make a Reel shine. To really nail the perfect reel size instagram, you need to get a handle on two key ideas: aspect ratio (the video's shape) and dimensions (its pixel size). Getting these right is what separates a Reel that looks polished and professional from one that just feels… off.
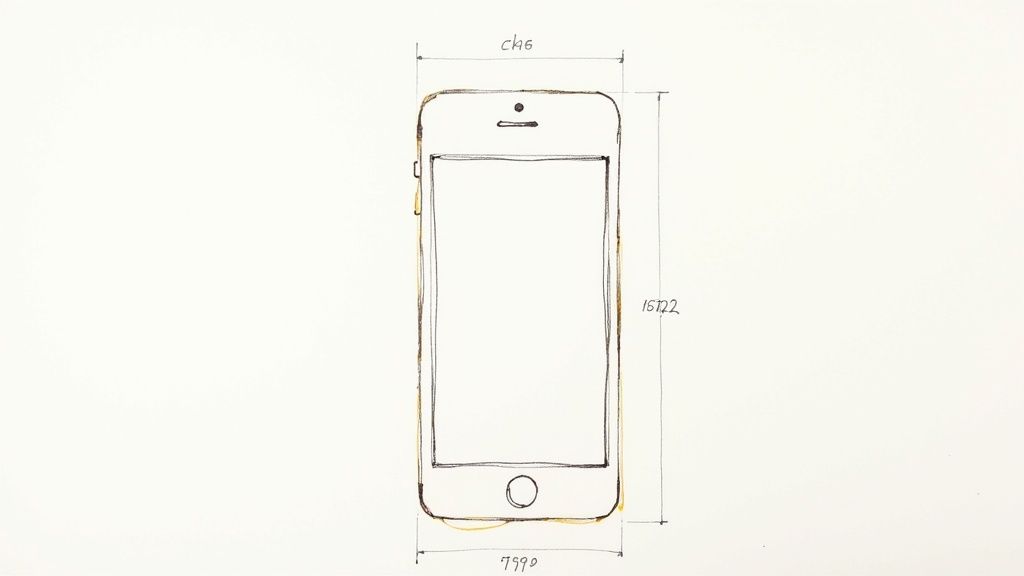
Think of aspect ratio as the shape of a picture frame. For Instagram Reels, the golden rule is a 9:16 aspect ratio. Picture a tall, vertical frame—that’s the exact shape of a smartphone held normally. It’s designed to fill the entire screen, grabbing all of your viewer's attention.
The opposite of this is the 16:9 aspect ratio, which is shaped like your TV or a movie screen. While it’s fantastic for movies, it’s a total misfit for a vertical-first app like Instagram.
What Happens When the Shape is Wrong?
So, what happens if you upload a wide video to a tall, vertical platform? Instagram tries to make it fit, but the result is always clunky. The app will either slap ugly black bars above and below your video, or it will aggressively crop the sides right off.
This is more than just a small visual annoyance. Cropping can cut off key action, chop someone's head out of the frame, or make your text overlays unreadable. It screams to the viewer that this content wasn't made for them, and that’s a fast track to getting scrolled past.
Why This Matters: Your video's shape is the first impression you make. A video that fills the screen feels professional and intentional. One that’s poorly fitted looks like a lazy afterthought, which hurts your credibility and can even impact how the algorithm shows your Reel to others.
The best practice? Always shoot and edit your video vertically from the start. This simple decision makes sure every pixel on that screen is working for you.
From Aspect Ratio to Pixel Dimensions
Once you've committed to the vertical 9:16 shape, the next step is making sure the video is sharp and clear. That’s where dimensions come in. The ideal reel size instagram recommends is 1080 x 1920 pixels.
- 1080 pixels is the width.
- 1920 pixels is the height.
These numbers give you a crisp, high-definition (HD) image that looks great on modern phones without creating a massive file that takes forever to upload. If your video’s resolution is too low, it will look blurry and pixelated. On the flip side, if it’s super high (like 4K), Instagram will just compress it anyway, which can sometimes result in weird visual glitches.
For a more technical dive, our guide on vertical video dimensions has you covered.
How Your Reel Looks in Different Parts of the App
Here’s where things can get a little tricky. Even though your Reel is created in a 9:16 format, Instagram displays it differently depending on where people see it.
- In the Main Feed: When your Reel shows up as a post while someone is scrolling, Instagram crops it to a 4:5 aspect ratio. This means a little bit of the top and bottom gets cut off.
- On Your Profile Grid: The thumbnail on your main profile page gets cropped even more, into a perfect 1:1 square.
Because of this, you have to be smart about your composition. Always keep your most important visuals—like your face, a product, or key text—near the center of the screen. This creates a "safe zone" on your 1080 x 1920 canvas, guaranteeing that nothing critical gets lost, no matter how Instagram crops it.
How to Navigate Instagram Reel Safe Zones
So you've nailed the perfect 1080×1920 pixel dimensions and the slick 9:16 aspect ratio. Great start, but your job isn't quite done. A Reel doesn't just float in space; Instagram plasters its own interface—buttons, your profile name, the caption—right on top of your video. This is where understanding safe zones becomes non-negotiable.
Think of it like this: you wouldn't design a beautiful magazine cover and then let the printer slap a giant barcode over the main headline. The safe zone is simply the area of your Reel that’s guaranteed to be seen, no matter what buttons or text Instagram overlays on it.
Ignoring the safe zone is a rookie mistake I see all the time, and it can completely derail a great video. Important subtitles, a clear call-to-action, or the best part of a product shot can easily get lost behind the "like" button or even your own caption. It just looks unprofessional and, worse, it frustrates viewers.
Mapping the Instagram UI Obstacles
To make sure your key content stays in view, you need to know exactly where Instagram puts its interface elements. While the app gets updated, these elements tend to live in the same general neighborhoods on your screen.
Here’s a quick rundown of the "danger zones" where you should avoid placing anything critical:
- The Bottom Section: This is by far the most crowded area. It's home to your profile icon, username, the first line of your caption, the audio track name, and all the engagement icons ("Like," "Comment," "Share"). A good rule of thumb is to keep the bottom 25-30% of your Reel clear of anything important.
- The Right-Side Rail: This vertical strip holds the main interaction buttons. It's a definite no-go zone for any text or logos you want people to actually read.
- The Top Edge: You'll find a thin bar at the very top with the "Reels" logo and the camera icon. It’s less of a problem, but it's still smart to leave a little breathing room.
The core idea is simple: Keep all your essential elements centered. When you design for the middle of the screen, you guarantee your message gets across, no matter what UI clutter Instagram decides to add.
This visual shows exactly what can go wrong when you get sizing and safe zones wrong, leading to frustrated viewers and poor engagement.
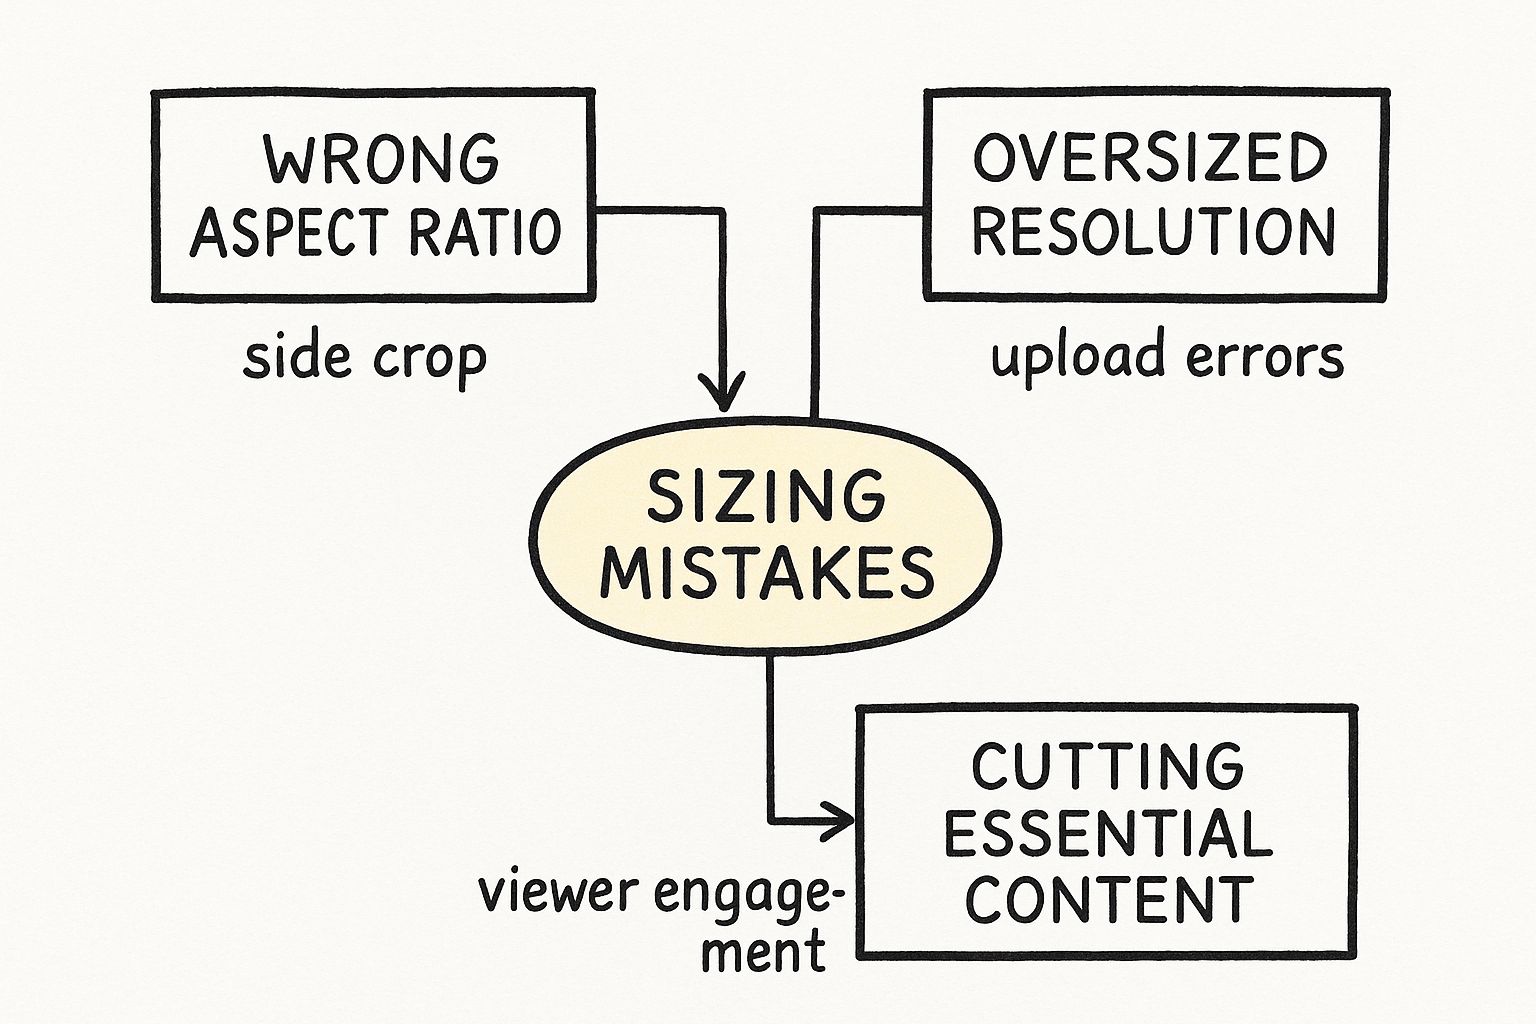
As you can see, cutting off your content is a direct result of these sizing mistakes, and it's a surefire way to kill your Reel's performance.
By keeping your subject, branding, and text within this central viewing area, you create a much smoother experience for your audience. They get your full message without having to guess what's hidden behind a button. Paying attention to these safe zones is what separates amateur content from the pros—it shows you care about the viewer experience, which almost always leads to better engagement.
Optimizing Your Video File for a Flawless Upload
You’re almost at the finish line. You’ve shot and edited a fantastic Reel, double-checked your dimensions, and made sure nothing important gets cut off by the interface. Now for one last, crucial step: prepping the video file itself.
Think of this as the final quality check before your masterpiece goes public. Getting your export settings right is what separates a crisp, professional-looking Reel from one that ends up pixelated, glitchy, or stuck in upload limbo. It ensures the video you poured your effort into looks just as brilliant on Instagram as it did on your editing timeline.
Choosing the Right File Format
When you’re ready to export, your editing software will ask you to pick a file format. You'll see a bunch of options, but for the web, it really boils down to two main players: MP4 and MOV.
So, which one should you choose? For maximum compatibility and headache-free uploads, MP4 is the undisputed champion. It’s the universal language of online video, offering a fantastic sweet spot between high quality and manageable file size. Honestly, it's the safest bet for Instagram.
While MOV files are also accepted, they can sometimes be a bit clunky, especially on non-Apple devices. Sticking with MP4 is the simplest path to a smooth upload every single time.
Understanding Codecs and Frame Rates
Inside that MP4 "container," two other settings are critical: the codec and the frame rate.
-
Codec (H.264): A codec is what compresses your video file so it’s small enough to send over the internet. The go-to standard here is H.264. It's brilliant at shrinking your file without making your video look like it was filmed on a potato. Selecting H.264 means a faster upload for you and smooth playback for your audience.
-
Frame Rate (30 FPS): This is simply how many individual pictures, or frames, are displayed every second. For that buttery-smooth look on Instagram, aim for 30 frames per second (FPS). Your camera might shoot in 60 or even 120 FPS, but Instagram will likely compress it down to 30 anyway. Exporting at 30 FPS from the get-go gives you more control over how the final video feels.
Pro Tip: Here’s a simple way to think about it. Your MP4 is the delivery truck. The H.264 codec is the super-efficient way the boxes are packed inside. And the 30 FPS is the smooth, steady speed the truck travels. Get all three right, and your delivery is guaranteed to arrive perfectly.
Managing Your Reel File Size
Instagram is pretty generous, giving you a 4 GB file size limit for Reels. That’s huge! Even so, you don’t want your file to be bigger than it needs to be. A massive file can take forever to upload and sometimes cause processing to fail.
If you find your exported file is too big, the fix is usually simple. Most video editors have a "quality" or "bitrate" slider in the export settings. Nudging it down just a little can slash your file size without anyone noticing a difference in quality. It’s all about finding that perfect balance.
Once your Reel is perfectly exported and ready to go, using a tool for scheduling Instagram posts can take your strategy to the next level. It lets you plan ahead and publish your content when your audience is most active, ensuring your beautifully optimized Reel gets the eyeballs it deserves.
Connecting Reel Quality to Real Engagement
This is where all the technical jargon starts to matter. Getting your Reel size for Instagram just right—from the exact dimensions down to the safe zones—isn't just about making a video look nice. It's about forging a direct path to better engagement. A crisp, perfectly framed Reel just feels more professional, and that polish keeps people watching. When that happens, you're sending a strong signal to the Instagram algorithm that your content has value.
Think of it this way: a blurry, awkwardly cropped video is like a shop with a dirty, smudged window. Even if the best stuff is inside, most people are just going to walk on by. High-quality visuals are your handshake, the first step in earning a viewer's precious time and attention.
The link between technical quality and how people interact with your content is impossible to ignore. When your videos look good, people are far more likely to hit like, drop a comment, or share it. That positive feedback tells Instagram your content is a winner, kicking off a powerful cycle that can fuel real growth.
How Posting Frequency Impacts Performance
While quality is king, consistency is what unlocks the kingdom. But "consistency" doesn't mean the same thing for every creator. How often you should post Reels really depends on your account's size and what you can realistically manage. Different strategies work for different people.
For example, big accounts with over 50,000 followers often post about one Reel every two days, hitting an average of 0.55 Reels daily. On the other hand, smaller accounts with fewer than 500 followers might share a Reel just once every five days (0.18 Reels daily), choosing to prioritize quality over sheer volume. Seeing these benchmarks can help you set a realistic pace for your own content schedule. You can dig into more of these stats and posting patterns in the detailed breakdowns of Instagram Reels engagement on sendshort.ai.
This data shows there's no one-size-fits-all formula for posting frequency. The real goal is to find a rhythm you can stick with, one that lets you create great content consistently without burning yourself out.
What Does Good Engagement Look Like?
To know if you're succeeding, you have to know what you're aiming for. Engagement isn't just some fuzzy idea; it’s a set of real actions that prove your audience is actually connecting with your work.
The Core Metrics: The average Reel pulls in about 243 likes, 8 comments, and 28 saves. These numbers give you a solid baseline for what "typical" engagement is, but remember that every niche has its own standards.
Each of these metrics tells a different part of the story:
- Likes: This is the most common thumbs-up, showing general approval.
- Comments: A sign of a much stronger connection. It means someone cared enough to stop and share their thoughts.
- Saves: This might just be the most valuable metric of all. A save means your content was so helpful or inspiring that someone wants to come back to it again.
Taking a deeper dive into understanding engagement rates can shed even more light on how the quality of your Reel translates directly into audience interaction. When you start tracking these numbers, you stop just making content and start strategically improving it. You'll begin to see the connection between a video that looks great and one that truly performs, building an engaged community one perfectly crafted Reel at a time.
Common Reel Size Questions Answered
Even when you think you have all the specs down, a few tricky questions always seem to pop up right as you're about to hit "post." Let's clear up some of the most common mix-ups about the correct reel size Instagram wants so you can publish with confidence.
Think of this as your last-minute cheat sheet. Getting these little details right is what separates a polished, professional Reel from one that just looks a bit… off.
Is Reel Size the Same as Story Size?
This is a classic "yes, but actually no" situation. When you're watching a Reel or a Story in full-screen mode, they are identical twins. Both use the same immersive 1080 x 1920 pixels canvas with a 9:16 aspect ratio.
The big difference comes down to where else they live on the app. A Story only ever appears full-screen. A Reel, on the other hand, also gets a spot in the main feed, where it’s automatically cropped to a 4:5 aspect ratio. Because of this, you have to think about their safe zones a little differently.
What Is the Best Quality for Instagram Reels?
If you want your Reels to look crisp and professional, always aim to export your video at 1080 x 1920 pixels. This is the high-definition sweet spot. It delivers fantastic clarity without being such a massive file that your upload takes forever.
Important Note: Whatever you do, don't upload a video with a resolution lower than 320 pixels wide. Instagram will try to stretch it to fill the screen, and you'll be left with a blurry, pixelated mess. Stick to 1080p.
Can I Post a 16:9 Widescreen Video?
Technically, Instagram will let you upload a horizontal video with a 16:9 aspect ratio. But honestly, you really shouldn’t. It completely defeats the purpose of a Reel.
When you post a widescreen video, your audience has to physically turn their phones sideways to see it properly. Most people just won't do it. Instead, they'll see a tiny video squeezed between giant black bars, which is a surefire way to get them to scroll right past.
What Size Is the Reel Cover on My Profile Grid?
This is a super important detail for anyone who cares about a well-curated profile. While you design your Reel cover to be 1080 x 1920 pixels, remember that Instagram crops it down to a perfect 1:1 square when it appears on your main grid.
That means you have to put your most important visuals—like the title text or your face—right in the center. This way, it looks great as a full-size cover and as that little square thumbnail on your profile.
Ready to take the guesswork out of social media? With Postiz, you can schedule your perfectly sized Reels, generate AI-powered content ideas, and track your performance all in one place. Try it today and see how easy it is to manage your social media presence.


